DIY Paw Print Art Ideas - Creative Keepsakes For Your Pet
There's a special kind of bond we share with our animal companions, isn't there? They bring so much cheer and warmth into our daily routines, filling our homes with happy sounds and soft purrs or playful barks. It’s a connection that, you know, really touches the heart, making us want to hold onto those precious memories for as long as we can. Our furry friends, with their unique personalities and silly quirks, leave a mark on our lives that’s pretty much impossible to forget.
Because these relationships mean so very much, finding ways to celebrate them feels quite natural. One truly lovely way to keep a piece of that affection close by is to create something tangible, something that captures a bit of their unique presence. This is where the idea of making art from their paw prints comes into play, offering a sweet and personal way to remember their little paws and the joy they bring.
Making art with your pet's paw prints is, as a matter of fact, a wonderful project that combines creativity with heartfelt sentiment. It's a do-it-yourself activity that anyone can try, regardless of their artistic skill. The best part, quite honestly, is the happiness you feel creating something so personal and lasting, a true keepsake from your beloved animal. Just like those who enjoy home improvements or fixing things themselves, finding that simple joy in making something with your own hands is what it's all about.
- Luka Doncic Cowboy Hat
- Real Diamond Meme
- Lee Dong Wook Inside Out 2
- Con Este Frio Se Antoja
- Torta De Gelatina
Table of Contents
- Why Make Paw Print Art?
- What Supplies Do You Need for DIY Paw Print Art?
- Getting Ready for Your DIY Paw Print Art Project
- How Do You Make Paw Prints with Clay?
- Exploring Ink and Paint for DIY Paw Print Art
- What Can You Do with Your Finished DIY Paw Print Art?
- Keeping Your Pet Happy During DIY Paw Print Art
- A Look Back at DIY Paw Print Art
Why Make Paw Print Art?
People often wonder why someone would go through the trouble of making art from a pet's paw. Well, you know, it’s really about capturing a moment, a tiny bit of their physical presence, in a way that lasts. Our animal friends are with us for a time, and every single one of their little quirks, their gentle nudges, or their playful pounces, becomes part of our daily rhythm. Making a paw print is a bit like freezing a happy memory, a tangible reminder of the special place they hold in our hearts. It’s a very personal way to honor the love you share, a kind of tribute that sits on a shelf or hangs on a wall, always there to bring a quiet smile.
Beyond just remembering them, these pieces of art are also quite unique. Each paw print, you see, is different, just like a human fingerprint. It shows the individual pads, the little toe beans, the overall shape of their foot. This makes every piece of DIY paw print art truly one of a kind, something that no one else will have. It's not just a generic picture of an animal; it's *their* print, a direct mark from your specific furry companion. It feels a bit like holding a piece of their very essence, a small, quiet celebration of who they are and how much they mean to you. So, in a way, it’s about creating a very personal, very meaningful piece of art.
And then there's the simple joy of the creation process itself. Just like someone who enjoys putting together a computer or tackling a home repair, there's a satisfaction that comes from doing something with your own hands. This kind of DIY project, making paw print art, can be a calming and rewarding activity. It’s a chance to spend some focused, gentle time with your pet, even if they’re just snoozing nearby while you prepare. The act of making something, especially something so full of meaning, is a quiet pleasure. It’s a chance to be creative, to express affection, and to produce something beautiful that holds a story. It’s a very satisfying feeling, really, to see the finished piece.
- Sadoer Marca De Donde Es
- The Honey Bun Defender
- Tribal Braids With Sew In The Back
- Opening Ceremony Olympics Threesome
- Why Is The Phrase Armed And Dangerous Deadly
What Supplies Do You Need for DIY Paw Print Art?
So, if you're thinking about creating some DIY paw print art, you might be wondering what sort of things you'll need to get started. The good news is, you don't typically need a whole lot of complicated items. It really depends on the kind of print you want to make. For instance, some people prefer a three-dimensional impression, while others might like a flat, inked image. Each method has its own set of basic items, but none of them are particularly hard to find. You probably have some of these things around your house already, actually, which makes it even easier to begin.
For a raised, sculptural kind of print, you’ll usually look at using some sort of clay or dough. There are special air-dry clays made for this, often found in craft stores or even pet shops. These are great because they harden on their own, so you don’t need an oven. Another option is salt dough, which you can make with just flour, salt, and water. This is a very budget-friendly choice, and it bakes hard in a regular oven. You’ll also want a rolling pin to flatten the dough evenly, and maybe some cookie cutters if you want a specific shape for your DIY paw print art piece. A bit of parchment paper is helpful, too, to keep things from sticking.
If you're aiming for a flat, ink or paint-based print, the main things you'll need are a non-toxic ink pad or some pet-safe paint. It’s really important that whatever you use is safe for animals, as they might lick their paws. You can find special ink pads designed for pet prints, which are often less messy. For paint, look for acrylics that say "non-toxic" on the label, or even tempera paint. You’ll also need paper or canvas to put the print on. Cardstock works well, or maybe a small, blank canvas for a more artistic look. A damp cloth or some pet wipes will be absolutely necessary for cleaning up your pet's paw right after, so, you know, keep those handy.
Getting Ready for Your DIY Paw Print Art Project
Before you even think about getting your pet's paw involved, it's a really good idea to get everything set up. This step is, arguably, one of the most important for a smooth and happy experience for both you and your animal friend. Think of it like getting all your ingredients ready before you start cooking; it just makes everything flow better. A little bit of planning can prevent a lot of fuss later on. You want the whole process to be as calm and quick as possible, especially since pets can sometimes be a little wiggly or impatient when something new is happening to their feet.
First, pick a good spot. A flat, clear surface is ideal, like a kitchen table or a clean floor area. Make sure it's somewhere you don't mind getting a little messy, just in case. Lay down some old newspaper or a plastic tablecloth to protect your work surface. This is particularly helpful if you're using ink or paint, as those can spread pretty easily. Having everything within arm's reach is also a very good idea. You don't want to be fumbling around for a wipe or a piece of paper once you've got a painted paw in your hand. So, you know, gather all your supplies and put them right there where you can grab them without having to move.
Consider your pet's mood and energy levels. Is it a time when they're usually relaxed, perhaps after a nice walk or a meal? Or maybe when they've just woken up from a nap and are still a little sleepy? Trying to get a paw print when they're full of zoomies or feeling stressed will probably not go very well. It's about setting the stage for success. You might also want to have a few of their favorite treats nearby, ready to reward them for their cooperation. This makes the whole experience positive for them, which is, in fact, what we want for our DIY paw print art session.
Setting Up for Your Paw Print Art
When you're truly ready to begin your DIY paw print art adventure, the actual setup needs to be quick and efficient. For clay or dough, have your flattened piece ready to go. Roll it out to an even thickness, maybe about half an inch, and if you’re using a cookie cutter, have it positioned nearby. For ink or paint, have your chosen paper or canvas laid out. Open the ink pad, or pour a small amount of paint onto a flat plate or piece of cardboard. You don't need a lot of either; just enough to coat the paw pads without making a big glob. Remember, less is often more when it comes to getting a clear impression for your paw print art.
Also, very importantly, make sure your pet's paws are clean and dry. If they've just come in from outside, or if they have any bits of dirt or debris between their pads, those will show up in your print. A quick wipe down with a damp cloth and then a thorough drying can make a big difference in the clarity of your print. Some people even trim the fur around their pet's paw pads a little bit, if it's very long, to get an even clearer impression. This step, while it seems small, really helps in getting a good, crisp image for your DIY paw print art. It's all about preparation, basically.
Finally, have your cleaning supplies ready and waiting. This means a bowl of warm, soapy water, or a pile of pet-safe wet wipes. As soon as the print is made, you'll want to clean your pet's paw immediately. This prevents any mess from them walking around with ink or paint on their feet, and it keeps them from licking anything they shouldn't. Having these items right there means you can act fast and keep the whole process brief for your pet. It’s about being prepared for every step, ensuring a happy outcome for your DIY paw print art project, and, you know, a clean one too.
How Do You Make Paw Prints with Clay?
Making paw prints with clay or dough is a very popular choice for DIY paw print art because it creates a lasting, three-dimensional keepsake. It’s a little different from ink or paint, as you’re pressing into a soft material rather than transferring color. The texture of the clay itself can also add to the charm of the finished piece. The process is fairly simple, but there are a few tips that can help you get a really good impression. It's about being gentle and patient, giving your pet a comfortable experience while still getting the result you want.
First, as we talked about, get your clay or dough ready. If you're using air-dry clay, knead it a little to make it pliable. If it’s salt dough, make sure it’s rolled out smoothly and evenly. You want a piece that’s thick enough to hold the impression but not so thick that it takes forever to dry or bake. Place your prepared clay on a piece of parchment paper or a non-stick surface. This makes it much easier to move the print later without distorting it. You might even want to press a cookie cutter into the clay *before* you get the paw print, to define the shape. This way, you don't have to cut around a fresh print, which could smudge it.
Now comes the main part: getting the paw print itself. Gently hold your pet's paw. You want to be firm but not forceful. Place their paw flat onto the clay surface and apply gentle, even pressure. You can press down on the top of their paw with your other hand, making sure all the pads make contact. Hold it for just a few seconds, then carefully lift their paw straight up. Try not to slide it, as this can smear the print. If it doesn't look quite right, you can usually smooth out the clay and try again, which is a nice thing about this method for DIY paw print art. Just remember to keep it calm and positive for your animal friend.
Crafting Clay Paw Print Art
Once you have a good paw print impression in the clay, the next steps depend on the type of material you chose for your DIY paw print art. If you used air-dry clay, you'll need to let it dry completely. This can take anywhere from 24 to 72 hours, sometimes even longer, depending on the thickness of your piece and the humidity in your home. It’s a good idea to flip it over gently after the first day to ensure even drying on both sides. Don't try to rush the drying process with heat, as this can cause cracks. Patience is pretty much key here.
If you made salt dough, it will need to be baked. Preheat your oven to a very low temperature, something like 200-250°F (90-120°C). Carefully transfer your salt dough print, still on its parchment paper, to a baking sheet. The baking time will vary a lot based on the thickness of the dough, but it could be anywhere from 1 to 3 hours, or even more. The goal is to dry it out slowly until it’s hard all the way through. You'll know it’s done when it feels firm and sounds hollow if you tap it. Again, don't try to bake it too fast, or it might puff up or crack, ruining your DIY paw print art.
After your clay or dough print is fully dry or baked, you can add some finishing touches. Many people like to paint their paw print art. You can use acrylic paints to highlight the paw print itself, or to add color to the background. Some folks even write their pet's name and the date on the back or around the edge. Once the paint is dry, you can seal it with a clear sealant spray or varnish to protect it and give it a nice finish. This makes your DIY paw print art even more durable and ready for display, a really lovely keepsake, basically.
Exploring Ink and Paint for DIY Paw Print Art
Ink and paint offer a different kind of DIY paw print art, creating a flat, two-dimensional image that can be framed, put in a scrapbook, or even used on cards. This method is often quicker than clay, though it can be a little messier if you’re not careful. The key is using the right kind of ink or paint and being prepared for a swift clean-up. It’s a very direct way to capture the unique pattern of your pet’s paw, and the results can be quite striking, actually, with all those little details showing up.
When using ink, a pet-safe ink pad is your best bet. These are designed to be non-toxic and easy to clean from paws. Place the ink pad on a flat surface. Gently take one of your pet’s paws and press it down onto the ink pad, making sure all the pads and toes get coated. You don’t need to press too hard, just enough to get a good transfer of ink. Then, immediately, press the inked paw onto your chosen paper or canvas. Again, press firmly and evenly, then lift straight up. Have a damp cloth or pet wipe ready to clean their paw as soon as the print is made. This is, you know, super important to prevent stray marks.
For paint, the process is quite similar, but you’ll want to apply the paint to the paw rather than pressing the paw into a paint container. Pour a small amount of non-toxic, pet-safe paint onto a flat plate or a piece of cardboard. Use a small brush or even a sponge to gently dab the paint onto your pet’s paw pads. Make sure to get an even coating, but don’t put on too much, or the print will be blobby. Then, press the painted paw onto your paper or canvas, just as you would with ink. Lift straight up, and clean their paw right away. This method for DIY paw print art can give you more control over the color and thickness of the print, in some respects.
Using Ink for Paw Print Art
Ink pads made for pet prints are usually less messy than liquid ink. They often have a special design where the ink is on one side of a clear film, and you press the paw onto the other side. This way, the paw never actually touches the ink, which is a very clever way to keep things clean. These "no-mess" ink pads are excellent for DIY paw print art, especially if you have a pet that's a bit squirmy or if you're worried about cleanup. They tend to give a very clear and crisp impression, showing all the little lines and details of the paw pads. It's a pretty straightforward process, really.
When using a traditional ink pad, make sure it’s a large enough size for your pet’s paw. If your pet has bigger paws, you might need to dab the ink onto their paw in sections. The goal is to get a full, even coating on all the pads and toes. Practice on a scrap piece of paper first, if you like, to get a feel for the right amount of pressure and how quickly you need to move. This can help you feel more confident when it's time to do the actual DIY paw print art piece. Remember, the quicker and smoother the action, the better the print usually turns out, so, you know, try to be efficient.
After you get the print, allow the ink to dry completely. This can take a few minutes, depending on the type of ink and paper. Once dry, your ink paw print art is ready for display. You can frame it, put it in a scrapbook, or even scan it to use on other items. The simplicity of ink prints makes them a very popular choice for capturing those precious paw moments. They’re a clean, sharp way to remember your pet’s unique print, a truly lovely memento.
Painting with Paw Print Art
Using paint for DIY paw print art gives you more creative freedom with colors and textures. You can choose any non-toxic paint color you like, perhaps one that matches your home decor or your pet's collar. As mentioned, acrylic or tempera paints are generally good choices, as long as they are marked "non-toxic." It’s a bit more hands-on than ink pads, but the results can be really vibrant and personal. You can even mix a couple of colors on the paw for a slightly marbled effect, if you’re feeling a bit adventurous.
When applying the paint to your pet’s paw, use a soft brush or a sponge applicator. This helps distribute the paint evenly without irritating your pet. Make sure to get into the crevices between the pads and toes, but avoid putting too much paint on the fur, as that can make the print look fuzzy. Just enough paint to coat the pads is ideal. It’s a delicate balance, really, between getting enough coverage and not overdoing it. You want a clear impression of the paw, not a blob of paint, so, you know, aim for a thin, even layer.
After the print is made and the paw is cleaned, let the paint dry completely. This might take a few hours, depending on the paint's thickness. Once dry, you can add details to your DIY paw print art with fine-tipped markers or more paint. You might draw a little heart, write your pet's name, or add the date. Some people even add glitter or other embellishments once the paint is fully set. This allows you to personalize your paw print art even further, making it a truly unique piece that reflects your bond with your animal friend. It’s a very satisfying creative process, actually.
What Can You Do with Your Finished DIY Paw Print Art?
So, you’ve successfully made some DIY paw print art, and now you have these wonderful impressions of your pet’s unique paws. What comes next? The possibilities for displaying and using your new artwork are pretty much endless, limited only by your imagination. These aren't just pieces of paper or clay; they are cherished keepsakes that deserve to be shown off. Thinking about how you’ll display them can be almost as much fun as making them, really, adding another layer to the creative process.
One of the simplest and most popular ways to display your paw print art is to frame it. A nice picture frame can elevate a simple ink print into a piece of wall art. You can choose a frame that matches your home decor, or one that has a special meaning. Some frames even come with multiple openings, allowing you to put a picture of your pet right alongside their paw print. This creates a lovely, cohesive display that tells a little story. It's a very classic and elegant way to keep your pet's memory close, a constant reminder of their presence, basically.
If you made a clay or salt dough impression, these can become beautiful ornaments. You can add a hole at the top before drying or baking, then thread a ribbon through it once it’s finished. These make wonderful Christmas tree ornaments, or you can hang them on a hook year-round. They also make incredibly thoughtful gifts for other pet lovers. Imagine giving a friend a handmade ornament with their pet's paw print; it's a very personal and touching gesture. These three-dimensional pieces of DIY paw print art have a lovely tactile quality, too, that makes them special.
Displaying Your Paw Print Art
Beyond frames and ornaments, there are many other creative ways to incorporate your DIY paw print art into your life. You could, for instance, create a custom mug. Many online services allow you to upload a scan of your ink print and have it printed onto a mug. Imagine sipping your morning coffee from a mug featuring your pet's actual paw print! This makes for a very personal and functional item, something you can use every single day. It’s a pretty neat way to keep your pet close, even when they’re not right there with you.
Another idea is to use your paw print art in a scrapbook or a memory album. This is a wonderful way to document your pet’s life, from their puppy or kitten days all the way through. The paw print can be a central feature on a page, surrounded by photos and little stories. It adds a very personal touch to your memories, making the album even more special. This is a quiet, reflective way to enjoy your DIY paw print art, a personal collection of moments that mean a lot.
For those who enjoy digital crafts, you could scan your paw print art and use the image in various ways. You could create custom greeting cards, personalized stationery, or even design a unique piece of digital art. The scanned image can be resized, colored, and incorporated into different designs. This opens up a whole new world of possibilities for your DIY paw print art, allowing you to share it or use it in ways that go beyond a simple physical display. It’s a very modern way to celebrate your pet, really, blending traditional craft with digital creativity.
Keeping Your Pet Happy During DIY Paw Print Art
The most important thing when creating DIY paw print art is, quite honestly, your pet's comfort and happiness. While the goal is to get a lovely keepsake, it should never come at the expense of stressing out your animal friend. Remember that the whole point of DIY, as many experienced crafters will tell you, is the joy of the process itself. If your pet isn't having a good time, then the project might not feel as joyful for you either. So, it's about making the experience positive and gentle for them, ensuring they feel safe and loved throughout.
Start by being very calm yourself. Animals can pick up on our emotions, so if you're feeling rushed or stressed, they might feel that way too. Speak to them in a soft, reassuring voice. Pet them gently and let them know what's happening, even if they don't understand the words. You know, a calm demeanor from you can make a huge difference in how they react. It’s about building trust and making them feel secure, which is pretty much essential for any interaction, especially one where you’re handling their paws.
Keep the whole process brief. Don't drag it out. Have everything ready to go so you can get the print quickly and then clean their paw right away. The less time their paw is covered in ink or clay, the better. If
- The Honey Bun Defender
- Con Este Frio Se Antoja
- Shark Bite Meme
- Alexandra Saint Mleux Father
- What Does Heaven Look Like

50 easy DIY projects made from items in your recycling bin | My Mommy
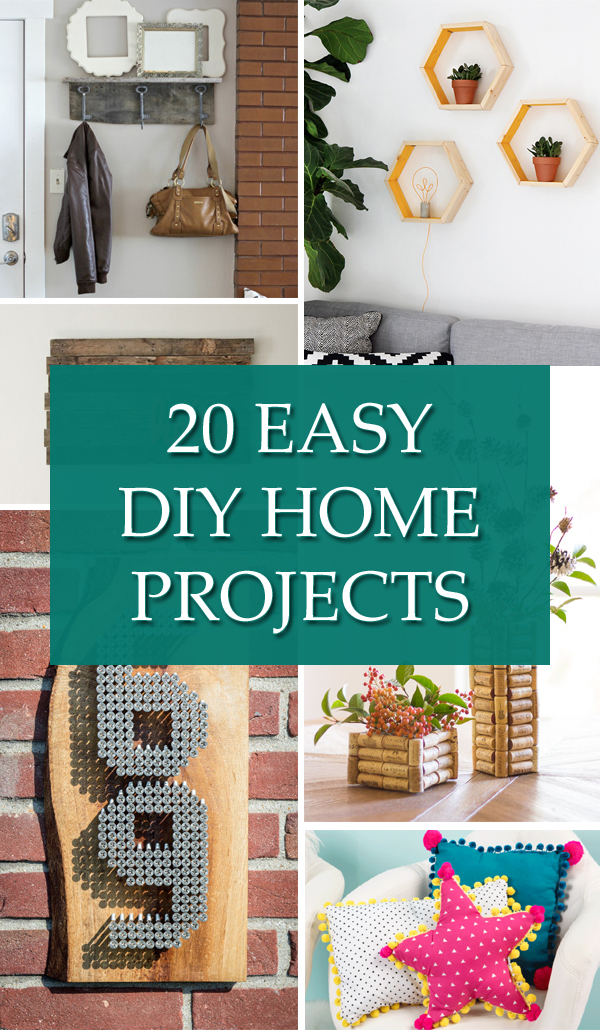
20 Easy DIY Home Projects You Can Do in a Day (or Less!)
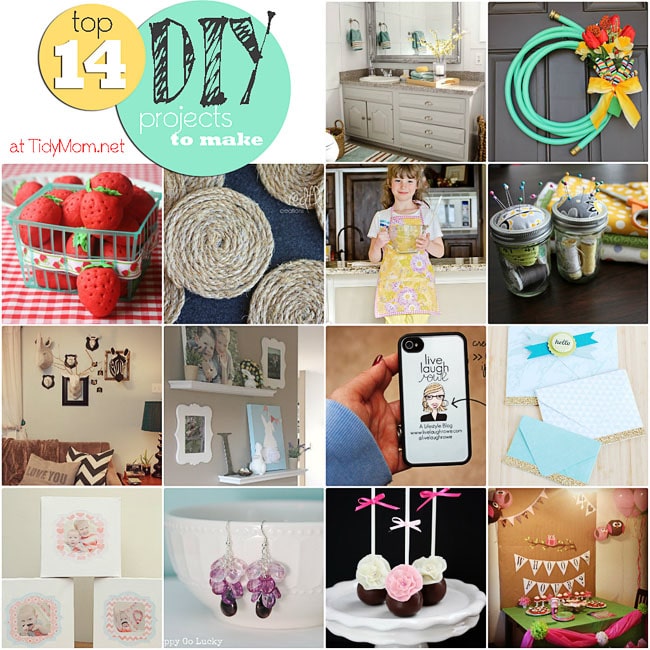
Top 14 DIY Projects to Make
